What's new
DiscussionHQ - General Discussions

DiscussionHQ is a general discussion forum that has opened December 2024!
We provide a laid back atmosphere and our members are down to earth. We have a ton of content and fresh stuff is constantly being added. We cover all sorts of topics, so there's bound to be something inside to pique your interest. We welcome anyone and everyone to register & become a member of our awesome community.

That's the Way It Crumbles, Cookie-Wise

A History of Hex Keys and Allen Wrenches


"How many times has someone asked you to grab an Allen wrench? Probably a lot, and of course in most cases if you said you’d grabbed an Allen wrench, you would be wrong. Just like asking for a Kleenex, a Band-Aid or a Q-Tip. The recognized brand name is often used for other similar products by different manufacturers, and so the name Allen wrench has come to be used interchangeably with all hex keys, and understandably so as the very first trademarked hex key in the US was made by Allen Manufacturing in 1910. The name has stuck ever since."
MORE

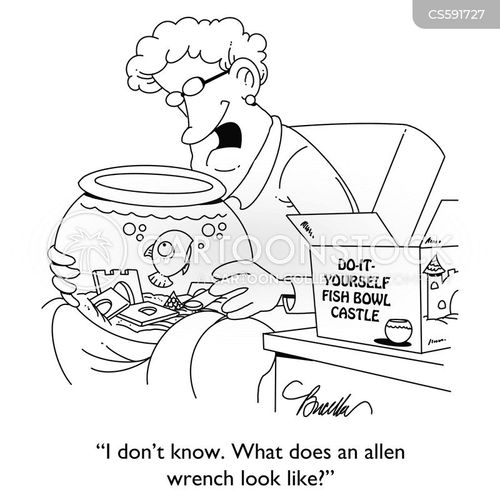
animals-allen_wrench-wrench-allen_key-goldfish-gold_fish-CS591727_low.jpg
 
Well, lah-dee-dah... :rolleyes: Now I'm going to have to find wall plate screws with star-shaped grooves. How do you keep them from unscrewing themselves if you don't tighten them the right amount? Even if you do, they seem to unscrew themselves eventually.

They don't have the proper Torx bit, but they seem to have the proper size of everything else.
 
.
aT6c3GL.gif


1756449073904.png

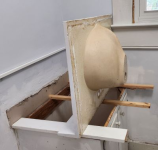
Thanks to a perfectly positioned window sill, this is very stable. It will allow a more than adequate coating of the backsplash in resin within the 10 minutes of working time. This has been a missing piece of the puzzle for a long time. I'm a little concerned about how to get it back down, but I'll think about that tomorrow.
 
Last edited:
1756785516627.png

First coat of resin on the backsplash and side splash Friday night. Only 5 or 6 bubbles appeared. Zapped them with the heat gun. Returned an hour later and dozens more had popped up. Tall ones poking up above the surface. I thought I had covered all the bases, bubble-wise. Just don't spread the coat too thick. The splashes are very slightly concave. The stuff must have puddled too thick in the middle?

I get it! You want thin coats? ... By golly you're going to get thin! :mad:

It took 36 hours for the resin to harden enough to sand down the bubbles. That's another clue. Sunday night I did a second coat on the side splash. Kept wiping the resin out of the low spot with one of those disposable foam brushes until it began to set. Two bubbles and 2 fisheyes (LINK) appeared, soon enough to fix. The fisheyes were likely caused by 2 specks of dust left over from sanding. Watched closely for 25 minutes after the resin formed a solid coating on top. Nothing more.
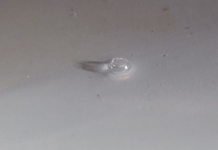
Two hours later one more bubble had appeared, 1/16" wide.
LkUcs1q.gif
If I thought this would be the last bubble ever, I'd give it a name and leave it. This is starting to get personal.

1756785540732.png
 
I am a Bubble
Sometimes easily burst, other times, not.
I can linger around and just float into space, without direction
Or I can land heavily and drop onto someone for anchorage.

I can be colorful—tinges and hues of reds, pinks, blues;
Transparent, translucent, opaque.
I don’t mind being transparent for I like to be sociable.

One very special bubble-strong and firm showed me the ‘light’ to persevere and to ‘hang’ in there.
I felt love and confident to move on.

I’m flying and enjoy floating with other bubbles.
I re-explored ‘new’ horizons that were really explored previously.
Passing the time on old territory helped me see that I had total control of the situation,
rather than being controlled by it.

I’m a happy bubble and have been all day.

Vera Ripp Hirschhorn
Boca Raton Branch, FL
fighting0026.gif
 
For the 3rd coat I used a little arts and crafts white foam roller to spread the resin extra thin. No bubbles. No fisheyes. No surprise. Waste of time. The 3 coats are now only at the thickness of a smartphone screen protector. Some foam particles got pulled off by the sticky resin and were left embedded. :rolleyes:

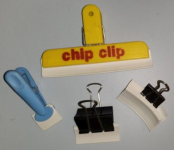
The only thing I haven't tried is a squeegee. You would need a tiny one on a curved sink, especially with a bowl that's carved out like a seashell. I had a roll of left-over flat rubber-like weatherstripping in the basement. With chips and binder clips it makes perfect little squeegees. Any size. Disposable. The natural curve of the weatherstripping bound in a roll for years is just about right for the sink bowl.

1756966091585.png
(click to enlarge)
 
This sink and I have had a chance to bond over the past few weeks. :rolleyes:

"It is the time you have wasted on your rose that makes your rose so important. You become responsible, forever, for what you have tamed. You are responsible for your rose." - Antoine de Saint-Exupéry, The Little Prince

I'm going to break two rules, because I suspect they are for professionals who coat garage floors for a living.

Rule 1: Do NOT thin

For the first coat, I thinned this stuff with 1/2 tsp acetone to 1 ounce of mixed resin (8%). The large squeegee was too large. The small squeegee was too small. The 2 medium ones were "just right." But even they are too slow to do the whole sink at once. I should have known better. The vertical surfaces in particular ended up with ridges and runs.

In places where this stuff pooled very thick it turned out smooth as glass, no bubbles anywhere. It's both the thickness of the coat and the thickness (viscosity) of the solution that matter. So, for the 2nd coat I'm also going to break ...

Rule 2: Do NOT pour thicker than 1/8"

For a little sink, it's more efficient to just pour a thick coat and sand off any bubbles, than to apply umpteen paper-thin coats. You have to wait until it cures and sand down everything, just for one bubble. That's one step forward and one step back. It's only the final coat that matters.

Started a 2nd coat on just the sides of the bowl. Sanded down the runs. Went back to thick resin and the curved squeegee. Whenever it started to set up, I dipped the squeegee in acetone and just kept working it until that didn't work any longer. I think I tortured it so much the bubbles finally surrendered. It looks better. In fact it looks pretty good unless you hold a flashlight on it. Reminds me of my drywall ceiling job.
 
Last edited:
Glad to hear that you are in the 'home stretch' Nancy!

“Well, I must endure the presence of a few caterpillars if I wish to become acquainted with the butterflies.”
― Antoine de Saint-Exupéry, The Little Prince
 
Last edited:
I made some modeling clay by heating equal parts of Elmer's white glue and corn starch in the microwave. It's pretty white stuff and works just like regular clay. It air dries very hard without oven-curing. The downside is it shrinks, but all store-bought air-dry clay shrinks.

I think it may be more expensive to make it yourself. I just wanted to try a little to see how much it really shrinks before buying some. It shrinks A LOT. I'd say 10%. Too much for what I want it for. But it was an interesting experiment, and I got rid of some cornstarch so old it may have predated expiration dates.
 
This is Max. He was a professional boxer who now wears eyeglasses.

"Alright?" ... "S'awright!"

1757996649654.png

Max covered in silicone resin

1757996615040.png

There was some left-over DIY clay. If there is any garage floor resin left over when the sink is finished, I'll see if it can be used to make a hard cast of Max.
 
Back
Top